
 Tiếng Việt
 ភាសាខ្មែរ
How to Properly Install a Butterfly Check Valve
Mastering the correct installation of a butterfly check valve is crucial not only for ensuring stable operation of the piping system but also for extending the lifespan of equipment and preventing issues such as leaks and malfunctions. This type of valve is widely used in water supply systems, fire protection systems, and chemical industry applications, due to its effective backflow prevention capabilities and compact design. However, incorrect installation—such as improper flow direction, uneven bolt tightening, or neglecting to inspect the flange surfaces—can lead to system failures as soon as it is put into operation.
In this article, Bao Tin Steel will guide you through the complete process of installing a butterfly check valve systematically—from tool preparation to precise execution steps, along with important technical notes to help you avoid the most common installation mistakes.
What is a Butterfly Check Valve?
Before starting the installation, it is essential to understand what a butterfly check valve is, its structure, and how it operates. A proper understanding of the device will enable you to perform the installation accurately and safely.
A butterfly check valve (also known as a two-door valve or flap valve) is a type of check valve that allows fluid to flow in only one direction and automatically closes when the flow direction reverses. The valve operates based on the pressure of the fluid: when the flow goes in the correct direction, the pressure pushes the two valve discs open; when the flow reverses or pressure drops, the two discs automatically close due to gravity or a return spring.
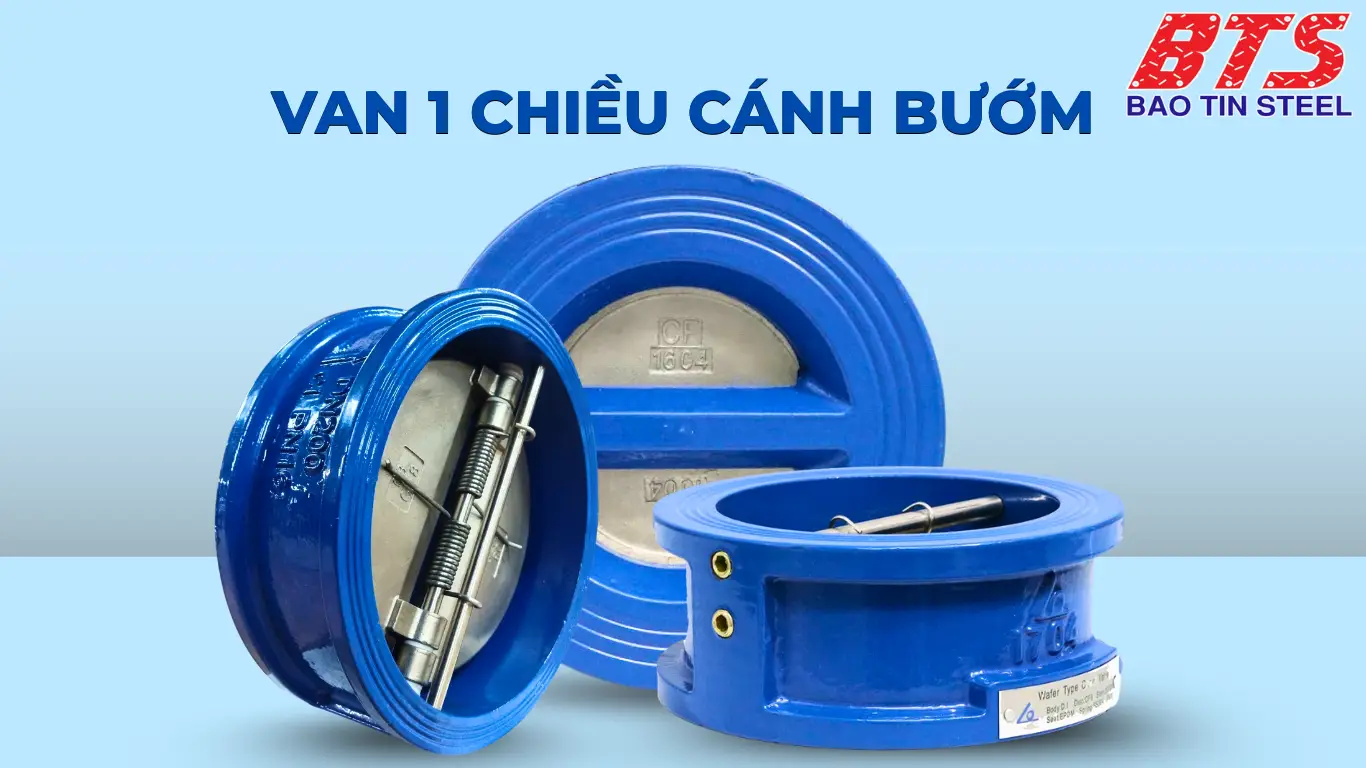
With its design with two semi-circular discs resembling butterfly wings mounted on a rotating shaft, this valve can quickly respond to flow changes and minimise hydraulic shock. This makes it a popular choice in systems that require flow stability and protection for upstream equipment such as pumps, flow meters, and air compressors.
Pre-installation Preparation for Butterfly Check Valve
To ensure a smooth installation process, proper sealing, and efficient operation, it is essential to adequately prepare both the equipment and tools, as well as the technical conditions. Below are the key factors that should be thoroughly checked before installing a butterfly check valve.
1. Safety Equipment and System Inspection
- Ensure that the pipeline has been fully isolated and depressurised.
- Equip yourself with the necessary PPE (Personal Protective Equipment) such as gloves, safety glasses, helmet, and non-slip shoes.
- Work in a well-ventilated area with adequate lighting and easy access for operations.
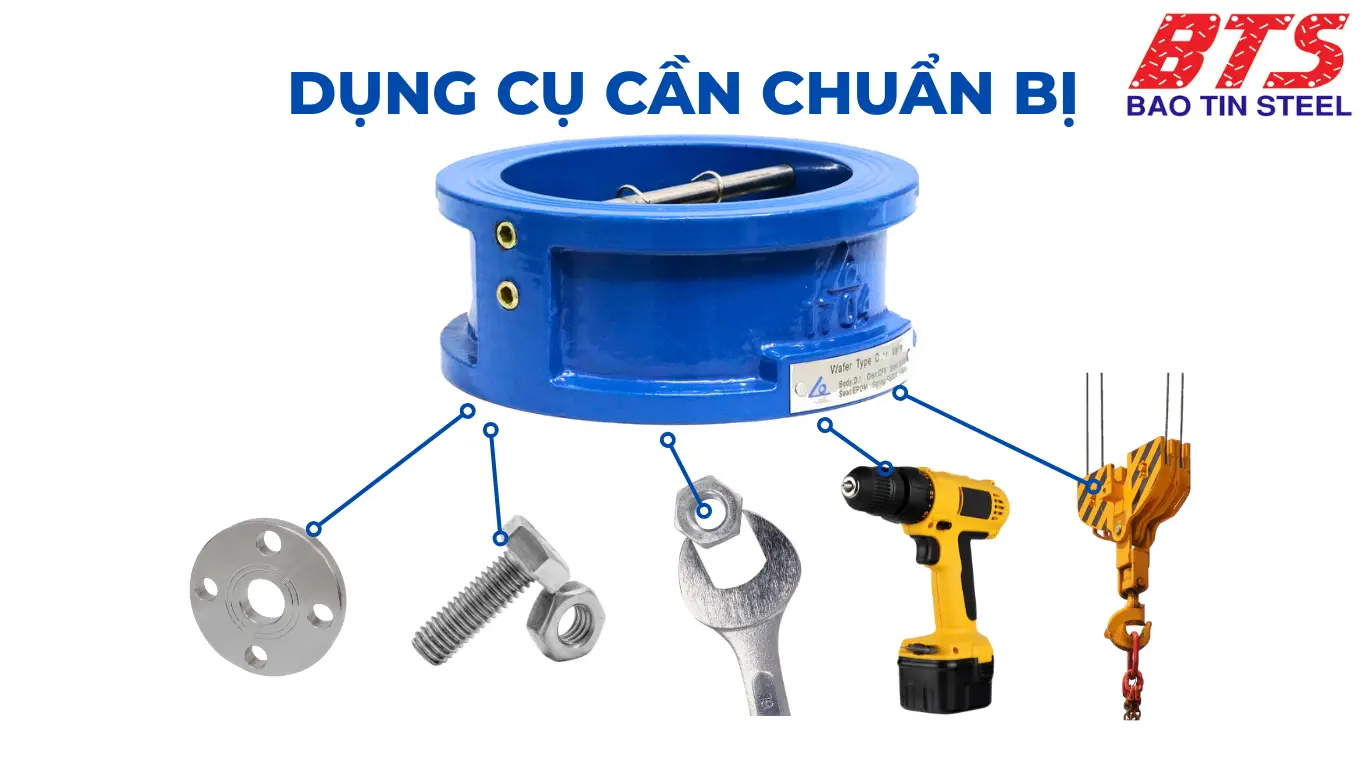
2. Necessary Tools and Materials
- The correct type of butterfly check valve (wafer or lug), with the proper size and connection standard (JIS, ANSI, DIN, etc.).
- Flanges that match the valve size and connection standard.
- Bolts, nuts, and gaskets in the correct quantity and material suitable for the working environment.
- Installation tools such as a torque wrench, spanner, calliper, screwdriver, tape measure, and marking pen.
- Sealing gaskets (if necessary) – typically not required for butterfly valves with integrated seals.
- For large-sized valves: Prepare lifting equipment such as a hoist, cables, and a forklift to prevent damage.
3. Pre-Installation Inspection
Valve Inspection:
- Ensure the valve is free from cracks, dents, and missing components. The valve disc should open and close smoothly.
Clean the Pipeline and Valve Interior:
- Remove dust, debris, rust, and metal shavings from both the pipeline and valve interior.
Flange Inspection:
- Ensure the flange is flat, not warped, without scratches, and concentric and parallel.
Flange Gap:
- Make sure the gap between the two flanges is sufficient to fit the valve body without needing to apply force.
4. Verify Technical Specifications
-
Check that the valve’s pressure and temperature ratings are compatible with the system’s operating conditions.
-
Identify the type of fluid (water, gas, chemicals, etc.) to ensure that the valve materials and seals are compatible and won’t corrode.
-
Determine the flow direction within the system and match it with the arrow symbol on the valve body.
Once all the above factors have been verified, you can move on to the most important phase—proceeding with the correct installation of the butterfly check valve to ensure safety and optimal performance.
Detailed Installation of the Butterfly Check Valve
After preparing the materials, tools, and thoroughly checking the system, you can begin the installation. Below is the step-by-step procedure for installing a butterfly check valve correctly:
How to Install a Butterfly Check Valve
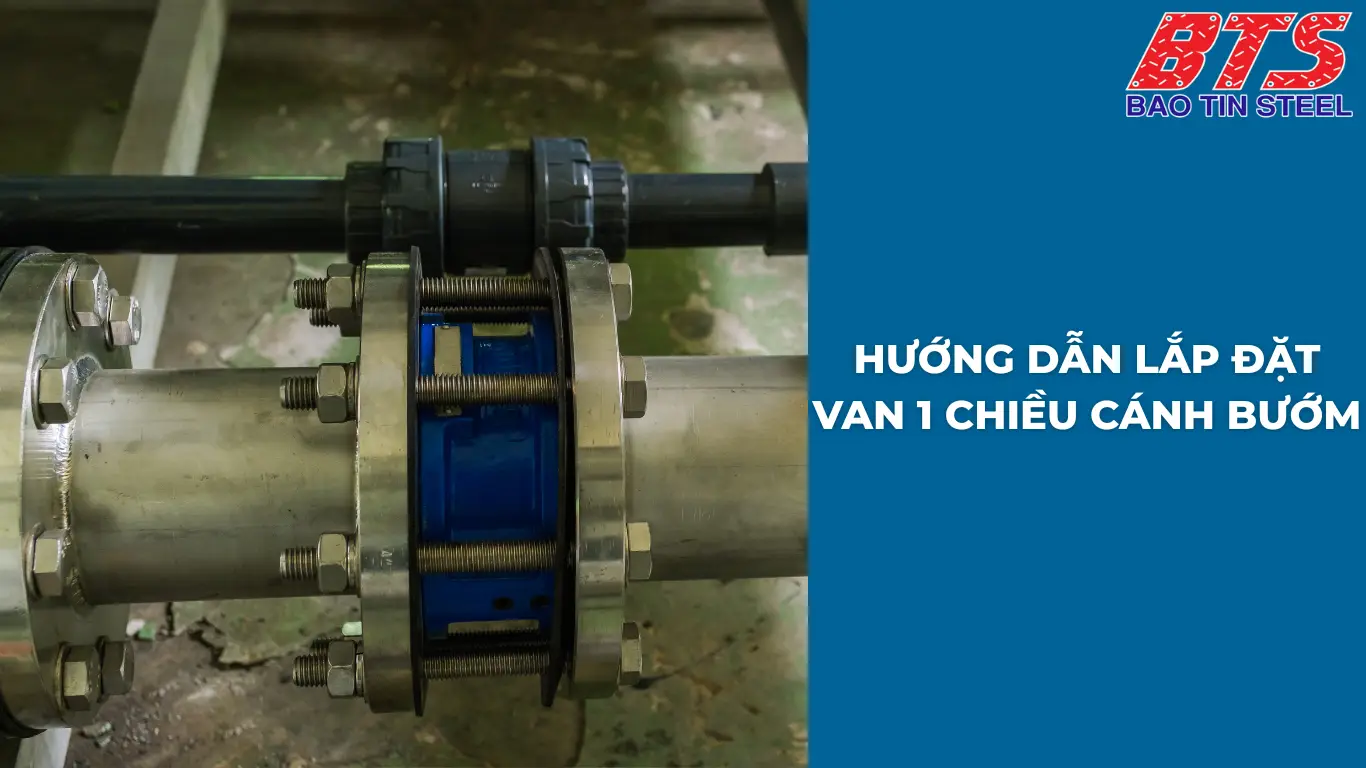
Step 1: Identify Position and Flow Direction
- Check the arrow on the valve body indicating the flow direction.
- Ensure the valve is installed in the same direction as the actual flow in the system.
- Do not install in the reverse direction, as the valve will not open, causing clogging or system damage.
Step 2: Align the Valve Between the Flanges
- Use tools to slightly widen the gap between the two flanges, just enough to insert the valve.
- Place the valve body in the centre, ensuring the valve’s centre aligns with the pipe’s centre.
- Do not use the valve to separate the flanges, as this may cause warping and damage to the gasket.
Step 3: Align Bolt Holes and Valve Disc
- Rotate the valve body so that the bolt holes on the valve align with the flange holes.
- Check that the valve disc is in a nearly closed position (slightly open) to avoid any bending or interference during installation.
Step 4: Install Bolts and Tighten in the Correct Sequence
- Install the bolts, nuts, and gaskets into the aligned holes.
- Tighten by hand in a cross-pattern, securing the valve temporarily.
- Use a torque wrench to tighten gradually in several stages (e.g., 30%, 60%, then 100% of the required torque).
- Refer to the torque table for bolt size and grade to avoid over-tightening or under-tightening.
Step 5: Final Check After Tightening
- Ensure the valve is not misaligned, and the valve disc does not hit or interfere with the flange.
- If there is a handle, gently rotate it to check that the valve disc opens/closes smoothly.
- If the valve is automatic (without a handle), observe its response during a trial water flow test.
Installation Position Considerations: Horizontal or Vertical?
The valve can be installed either horizontally or vertically, but it is recommended to install the valve with the shaft in a horizontal position to reduce wear and optimise the opening and closing function.
If handling fluids with sediments or sludge, it is recommended to position the valve disc so that it opens in the flow direction from top to bottom, creating a self-cleaning effect.
You’ve completed the installation process!
Next, don’t forget to check the valve’s operation and address any leaks after installation to ensure safe and effective operation from the start.
Key Technical Considerations for Installing a Butterfly Check Valve
While the installation process is not overly complex, overlooking important technical factors can still lead to issues during operation. Below are key technical considerations to keep in mind when installing a butterfly check valve:
1. Do Not Use the Valve Body to Separate the Flanges
A common mistake is using the valve body to widen the flange gap, which can easily deform the valve body, misalign the sealing gasket, and cause leakage.
Always use specialised tools (such as wedges, hydraulic jacks, etc.) to create a safe gap for placing the valve between the flanges
2. Ensure Proper Spacing from Other Equipment
Do not install the valve too close to pumps, pipe elbows, tees, or other valves, as this can cause turbulent flow, negatively affecting the valve’s opening and closing performance.
Follow These Guidelines:
👉 Minimum distance in front of the valve = 6D (6 times the pipe diameter)
👉 Distance behind the valve = 4D
Align the Flanges Concentric and Parallel
- The flanges must be flat, not warped, and concentric with each other.
- If installed eccentrically, the tightening force will be uneven, leading to leakage or causing the valve to become stuck during operation.
4. Identify and Install the Correct Flow Direction
- The valve body always has an arrow indicating the flow direction – ensure you install the valve according to this direction.
- If installed in reverse, the valve will not open, causing blockages or damaging the pump and other upstream equipment.
5. Do Not Install the Valve with Dirty Pipelines
- Thoroughly clean the pipeline using compressed air or clean water before installing the valve.
- Metal shavings, sand, or rust can scratch the gasket, preventing a proper seal.
6. Should Sealing Gaskets Be Used?
- Most butterfly check valves come with an integrated gasket, so additional gaskets are not needed.
- However, for systems requiring high sealing performance, you can use an external gasket, but make sure it is compatible with the fluid and temperature.
Never Insert a Gasket That Is Too Thick, as it may increase the tightening torque, causing the valve disc to become stuck.
These technical considerations will help you install the butterfly check valve correctly, avoid common mistakes, and ensure the equipment operates smoothly and reliably over time.
Common Installation Errors and How to Fix Them
Although there is a clear installation process, in practice, many people still make basic technical errors when installing butterfly check valves, resulting in inefficient system operation or even damage after a short period of use. Below are the common errors in installing butterfly check valves and their corresponding solutions.
| Error | Cause | Consequence | Solution |
|---|---|---|---|
| Incorrect flow direction installation | Failure to check the flow direction arrow on the valve body | Valve won’t open, causing blockage or damage to the system | Remove the valve, and rotate it to match the flow direction as indicated by the arrow |
| Uneven or overly loose bolt tightening | Hand tightening, not following a cross pattern, or lack of proper tools | Flange leakage, valve body deformation, or seal failure | Tighten bolts in a cross pattern using a torque wrench, applying the specified torque value |
| Misalignment of flange concentricity | Improper alignment during installation, not using a measuring tool | Uneven stress, causing the valve to bend or the valve disc to become stuck | Re-align the valve body to be concentric with the pipe using proper measuring tools |
| Installing the valve too close to other equipment (pump, tee, etc.) | Insufficient spacing from accessories | Turbulent flow, vibration, and unstable valve operation | Relocate the valve or add an intermediate pipe (spool piece) if needed |
| Failure to clean the pipeline properly | Skipping the cleaning step before installation | Debris causing valve blockage, gasket damage, and operational issues | Clean the entire pipeline and valve body thoroughly |
| Using the wrong gasket or unnecessary gasket installation | Failure to refer to technical guidelines | Leakage, increased tightening force, and improper valve sealing | Remove or replace with the correct gasket material and size that is suitable for the system |
Understanding these errors and promptly correcting them will help you ensure installation quality, increase valve durability and avoid system interruptions.
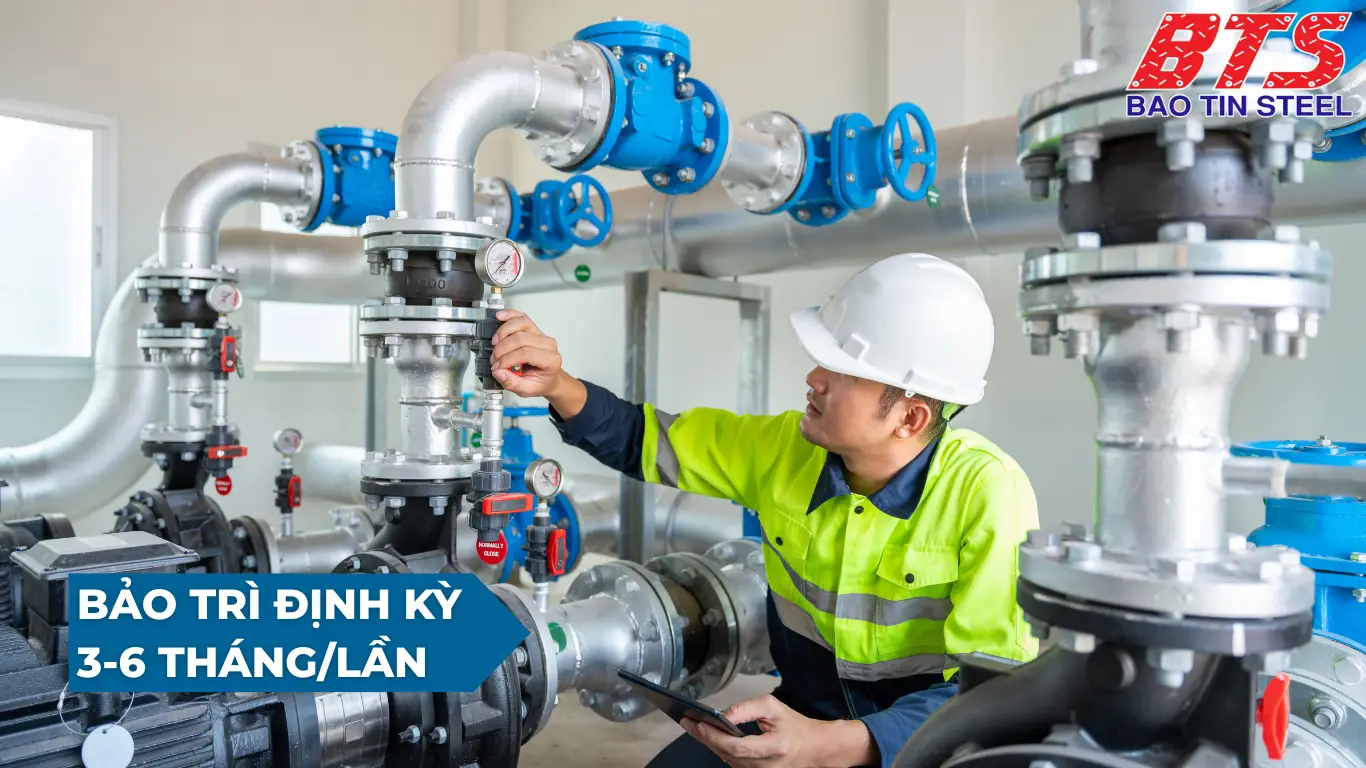
Maintenance instructions after installing butterfly check valve
After successful installation and commissioning, maintaining stable operation and prolonging the life of the butterfly check valve requires a regular and technically correct maintenance plan. Below are the maintenance steps and principles to be followed:
 Regular valve maintenance to ensure operating performance
1. Periodic inspection according to operating cycle
- Observe for signs of leakage at flange joints.
- Check that the valve disc opens/closes flexibly, without jamming or entanglement.
- For valves with operating handles, try rotating them to feel the lightness and evenness of the movement.
- After a period of use, dirt or rust can accumulate inside, affecting the tightness of the gasket.
- Use compressed air, clean water or mild chemicals to flush.
- If the valve handles highly viscous fluids, it needs to be cleaned more frequently.
4. Lubricating Moving Parts (if applicable)
- For valves with rotating shafts, hand wheels, or levers, it is recommended to apply lubricant regularly at the joints to prevent rust and reduce friction.
- Note:
Do not lubricate the valve disc or gasket, as this could compromise the sealing performance.
5. Replace the Gasket When Signs of Wear Are Detected
- If leakage is observed despite the bolts being tightened to the correct torque, the gasket may be worn or damaged.
- Solution:
Remove the valve, inspect, and replace the sealing gasket with the correct type and size.
6. Periodic Operation for Infrequently Used Valves
- If the valve is located in a low-traffic area, it is recommended to operate it once or twice a month to ensure it doesn’t seize.
- Periodic opening and closing help prevent sticking or corrosion at the fixed position.
Regular maintenance not only helps maintain the optimal operating performance of butterfly check valves but also minimises the risk of unexpected failures, saving on future repair costs. For critical industrial systems, establishing a maintenance schedule and keeping records of periodic inspections are essential.
Bao Tin Steel – A Trusted Industrial Valve Supplier
Once you have mastered the proper installation technique for butterfly check valves, the next crucial step is selecting a reliable supplier to ensure product quality, clear origin, and comprehensive technical support.
Bảo Tín Steel is proud to be a leading industrial valve distributor in Vietnam, specializing in providing a wide range of valve types, including:
- Butterfly check valves (wafer, lug)
- Lever-operated butterfly valves, electric & pneumatic actuated butterfly valves
- Gate valves, globe valves, ball valves, safety valves, Y-strainers, pump strainers, etc.
Our Commitment:
High-quality products, imported directly from reputable brands with full CO and CQ certificates.
Competitive pricing, with discount policies for distributors and projects.
Dedicated technical support, providing drawings, documentation, and detailed installation instructions.
Large-scale stock with fast nationwide delivery, especially in HCMC, Bac Ninh, and Cambodia.
With over 10 years of experience in the industrial materials and fire protection industry, Bao Tín Steel has partnered with more than 3,000 clients, including contractors, mechanical workshops, investors, and technical system design companies.
Are you looking for high-quality butterfly check valves at competitive prices with detailed installation guidance?
Contact Bao Tín Steel now to receive a quick quote and expert advice on the best solutions for your system.
Hotline: 0932 059 176 | Email: kinhdoanh@thepbaotin.com
Tiger Steel is a subsidiary of Bao Tin Steel.